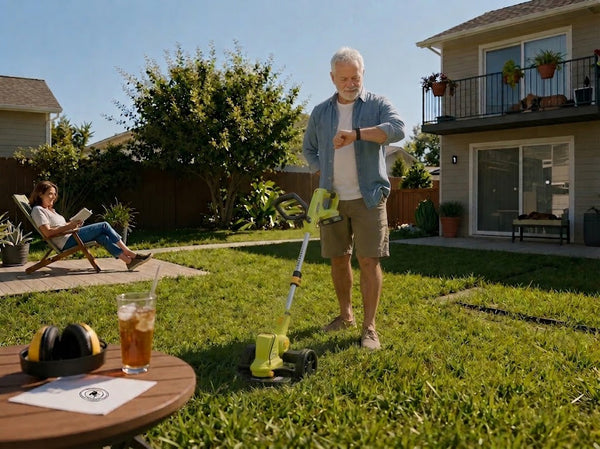
A perfectly edged lawn has clean, defined borders between the grass and areas such as garden beds, paths and driveways. To get a neat finish, choose the right edging tool, follow the existing boundary, work slowly and keep the edge consistent.
Lawn edging doesn't need to be complicated or require professional landscaping skills. With the right approach and a few simple tips, you can create tidy, well-defined edges yourself and keep them looking neat with regular maintenance. In this guide, we'll explain how to edge a lawn step by step, which tools you can use, and how to achieve a clean finish without unnecessary effort.
What Is Lawn Edging and Why Does It Matter?
Lawn edging is the process of creating a clear boundary where grass meets another surface, such as a garden bed, footpath or driveway. Over time, grass can spread beyond this boundary, which can make the lawn look untidy and allow it to creep into areas where you don’t want it.
Keeping the edges maintained also makes regular lawn care easier. A defined border gives you a clear line to follow when mowing or trimming, so there is less need to go back over the same area. It can also make garden beds, paths and other features look more defined without requiring major changes to the garden itself.
What Tools Do You Need to Edge a Lawn?
The best tool for edging a lawn depends on the size of the area, the type of border you’re working with and how much control you want over the cut. A dedicated lawn edger can give you a very defined line. A whipper snipper is useful for trimming grass around existing borders and hard-to-reach areas. A multi-purpose lawn tool can also be a practical option for homeowners with smaller lawns or compact outdoor spaces who want one lightweight tool for several routine lawn-care tasks.
Lawn Edger
A lawn edger is designed specifically to create a clean, defined line between grass and another surface. It is a good choice when you want a more precise finish.
Edgers can be particularly useful when the grass has started to grow over an established boundary. Rather than simply trimming the grass blades, the cutting action helps redefine the edge and bring it back to a neat, consistent line.
Whipper Snipper
A whipper snipper can be useful for trimming grass along areas that are difficult to reach with a mower. It works well around fences, garden beds, trees and irregular borders where you need more flexibility. A common confusion comes from thinking a whipper snipper and an edger are the same tool. A whipper snipper is primarily designed for trimming grass, while edging focuses on creating a defined border between the lawn and another surface.
The main thing to keep in mind is control. Holding the tool at the wrong angle or moving too quickly can result in an uneven finish or accidentally cut into the lawn. For the neatest result, use the existing boundary as your guide and trim slowly along it.
A Multi-Purpose Lawn Tool
If you regularly need to tackle more than just lawn edges, a multi-purpose tool can make garden maintenance simpler. For homeowners with smaller lawns, compact gardens or areas with obstacles, a versatile lawn tool can help with everyday maintenance tasks such as mowing smaller lawn sections, trimming hard-to-reach grass and maintaining edges.
This can be especially useful if you prefer a lightweight, easy-to-manoeuvre tool or don’t want to store several bulky garden tools. The advantage is not replacing every lawn-care machine, but having a practical option for smaller jobs where a larger mower or multiple tools may be unnecessary.
Other Tools That Can Help
You may also need a few simple tools to prepare the area and tidy up afterwards:
-
Shovel or spade: Useful for removing excess soil or cutting back an overgrown section when redefining an existing edge.
-
Edging guide: A string and stakes or marking paint can help you create a clear line, particularly when working on a new or very straight border.
-
Rake or leaf blower: Handy for clearing grass clippings and loose soil once you’ve finished edging.
-
Safety equipment: Safety glasses can help protect your eyes from flying grass or debris. If your tool is noisy, hearing protection is also worth considering.

How to Edge a Lawn Step by Step
Once you have the right tool, edging the lawn is mostly about creating a clear line and following it carefully. Taking a little extra time at the beginning can make the edging much easier and help you achieve a more even result.
1. Choose Your Lawn Edge
Before you start cutting, decide exactly where you want the lawn to end. Use existing features such as a path, driveway, garden bed or retaining edge as your guide. If there isn’t a clear boundary, mark the line first so you have something to follow.
It’s worth taking a moment to look at the whole area before you begin. A consistent line will usually look neater than trying to follow small changes in the grass as you go.
2. Decide How Deep You Want to Edge the Lawn
The depth of the cut will depend on the type of edge you’re creating and how established the grass is. If you’re maintaining an existing edge, you may only need to remove grass that has grown beyond the existing boundary.
If an edge has become heavily overgrown, it is usually easier to gradually bring it back rather than removing too much grass or soil in one pass. As a general rule with overgrown grass, trim it first, then mow it, and edge as the last step. Avoid cutting deeper than necessary. The goal is to create a clear separation between the lawn and the surrounding area, not to remove large amounts of soil.
3. Clear the Area
Before edging, remove anything that could get in the way of your tool. Pick up sticks, stones, fallen branches and other loose objects around the edge of the lawn.
Clearing the area gives you a better view of the line and makes it easier to work without stopping. It also helps you spot obstacles that could interfere with the cutting head or be thrown while the tool is running. Once the edge is clear, you can work along it more confidently and focus on keeping the cut even.
4. Follow the Existing Border
If the lawn already has an established edge, use it as your guide rather than creating a new line as you go. Keep the cutting head aligned with the boundary between the grass and the garden bed, path or driveway.
5. Work Slowly Along the Line
There’s no need to rush when edging. Move the tool steadily along the boundary and give yourself enough time to see where you’re cutting. Working too quickly can make it harder to control the tool and may result in an uneven line.
For longer sections, it can help to work in manageable stretches rather than trying to complete the entire edge in one continuous movement. This gives you a chance to check your progress and adjust your position if needed.
6. Keep the Edge Consistent
Try to maintain the same distance and angle as you move along the lawn. Consistency is what makes an edge look intentional, particularly where a long section of grass runs alongside a straight path or driveway.
Every garden will have some natural curves and uneven sections, so the aim isn’t necessarily to make every edge perfectly straight. Instead, follow the shape of the existing border while keeping the cut as even as possible.
7. Clean Up the Cuttings
Once you’ve finished edging, clear away any excess grass clippings and loose soil from the border. If the clippings are short and finely cut, you can leave them on the lawn to break down naturally and return nutrients to the soil, helping support healthier grass. Otherwise, a quick sweep or rake can help reveal the finished edge and keep loose material from covering the line you’ve just created.
This is also a good opportunity to check the whole area. If you notice a section that looks uneven or has been missed, it’s easier to make a small adjustment now than to wait until the next time you edge the lawn.
8. Repeat Regularly
Lawn edges don’t stay defined forever. Grass will naturally grow back towards paths, garden beds and other surrounding areas, so occasional maintenance is part of keeping the border in good shape.
How often you need to edge depends on how quickly your grass grows and the time of year. For most lawns, a quick touch-up every 2 to 4 weeks during periods of active growth can help keep the edges under control. In slower-growing periods, you may only need to edge every 4 to 8 weeks, depending on the grass and local conditions. Rather than waiting until the grass has spread well beyond the boundary, keeping up with smaller touch-ups can make each edging session quicker and easier.

Tips for Getting Straight, Clean Lawn Edges
A few simple habits can make edging easier and help you get a more consistent result:
-
Edge when the grass is dry: Dry grass is generally easier to cut cleanly and less likely to clump around the tool.
-
Use a guide for straight lines: For a new or very straight edge, a string line or another visible guide can help you stay on track.
-
Take your time around curves: Follow the natural shape of the garden bed or path rather than trying to force a perfectly straight line.
-
Don’t take off too much at once: If an edge is badly overgrown, bring it back gradually rather than making a deep cut in one pass.
-
Step back and check your work: Looking at the edge from a little distance can make uneven sections easier to spot while you still have the tool out.
-
Choose a tool that's easy to handle: A lightweight, manageable tool can make it easier to maintain control, particularly when edging larger areas or working for longer periods.
A Practical Tool for Maintaining Lawn Edges
Once you understand the basics of lawn edging, the biggest difference usually comes down to using a tool that suits your garden and the type of maintenance you regularly need to do.
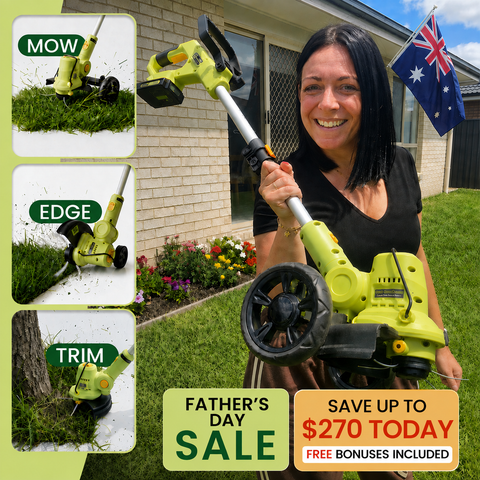
For homeowners with smaller lawns, narrow pathways, garden beds and areas that are difficult to access, a lightweight multi-purpose tool can be a practical option. Rather than storing several different tools for occasional jobs, having one compact tool that can handle everyday lawn maintenance can make smaller tasks easier to complete. The Lawno is designed for this type of routine lawn care, combining mowing smaller lawn areas, trimming grass around obstacles and edging in one compact design.
When used for edging, The Lawno's dedicated edging wheel allows you to work sideways along the lawn border, helping you follow paths, driveways and garden beds more easily. Its lightweight design (it weighs only 2.3 kgs including the battery) also makes it easier to hold and manoeuvre when working around corners, fences and other obstacles where control is important.
For larger open lawns, a full-size mower may still be the better choice. However, for edging, smaller spaces and regular maintenance jobs around the home, having a compact tool that is easy to use can help keep lawn edges looking neat without requiring a large collection of equipment.
Final Thoughts: A Cleaner Lawn Starts at the Edges
A well-kept lawn is often about the small details. Once the edges are tidy, the whole garden can feel more cared for and put together – without needing to completely rethink how it should look.
The good news is that lawn edging is a job you can take care of yourself. With a little regular maintenance and a tool that feels comfortable to use, keeping your lawn looking its best can become a simple part of your usual garden routine.
There’s also something satisfying about being able to step back and see the difference after doing the job yourself. You don’t need professional landscaping skills or a complicated setup to make a noticeable improvement. A little time spent tidying the edges can make your lawn look much neater and tidier.